So you’ve just taken a photo on your iPhone. It looks good, but the problem is that maybe it’s a bit skewed, or maybe there are some elements in it that need to be cropped out, or maybe it’s a little darker than you would have liked.
There are plenty of apps out there that will help you edit your photos, but thankfully, you won’t need to go through the trouble of finding an app and downloading it and learning how to use it, because Apple has actually built-in some pretty robust editing tools in iOS that you can access on the fly.
How To Begin The Editing Process
- Open the Photos app and select the photo you want to edit
- Tap the Edit button at the top right corner of the screen
How To Crop And Rotate Your Photos

- To crop your photo, tap the Crop button located at bottom of the screen
- Tap on any of the four corners and drag it in any direction to crop what you need
- If the photo is at an odd angle, you can also drag the dial to change the angle of the image
- If you want to rotate it horizontally or vertically, you can tap the rotate button at the bottom right corner of the screen
How To Add Filters To Your Photos

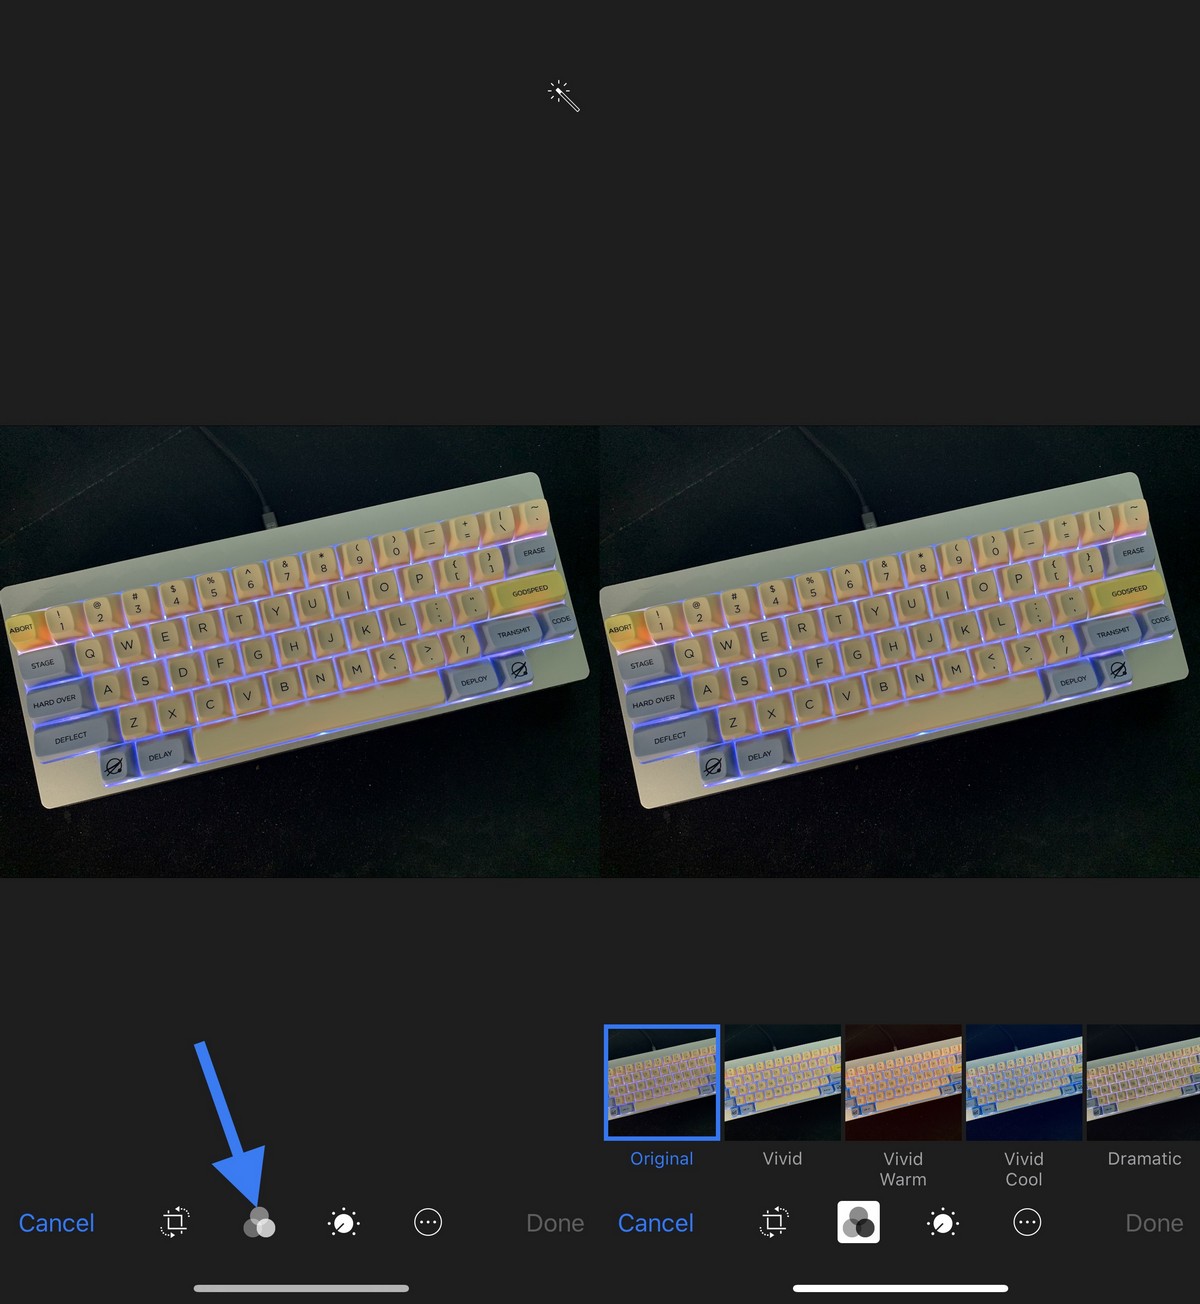
- Tap the Filter button which is the second button at the bottom of the screen
- Scroll through the various filters, tap on them to apply it to the photo
- Tap Done at the bottom right corner of the screen when you’re done
How To Adjust A Photo’s Exposure, Saturation, and Contrast
As we said, Apple has actually built-in some pretty robust editing features into iOS. This includes the ability to adjust the photo’s exposure once it has been taken. Users will also be able to adjust the color of the photo, like its saturation and contrast, and where you can even transform a photo into a black and white image.

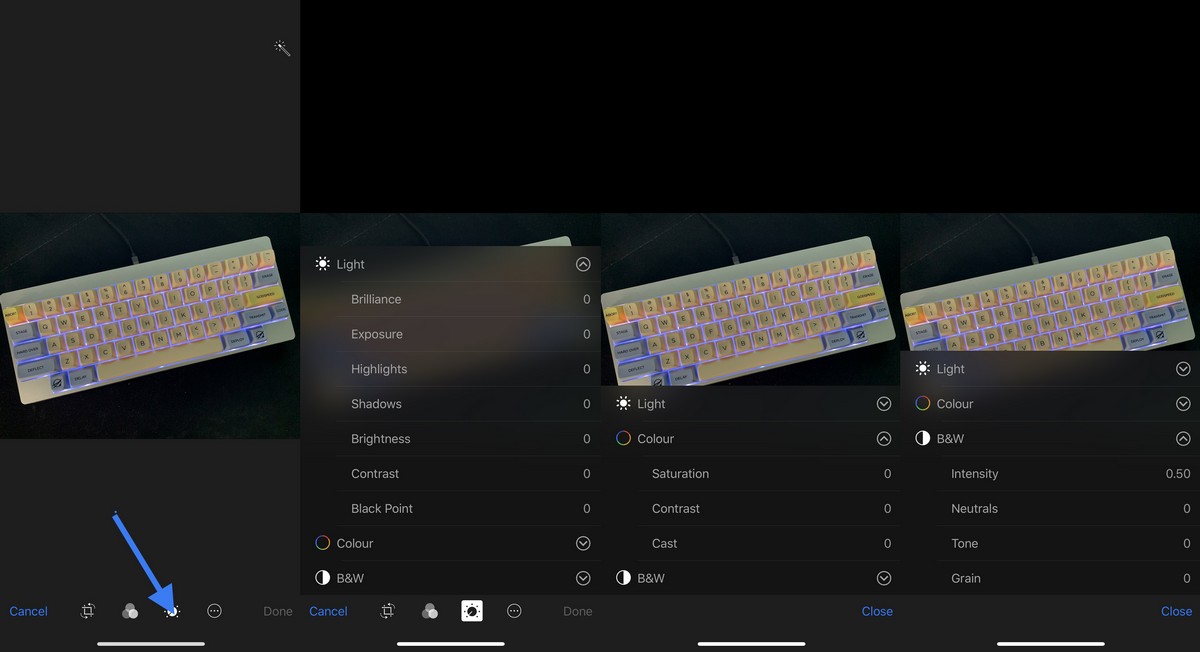
- Tap the third icon at the bottom of the screen
- This will bring up several options that you can choose from. You can tap the arrow button to bring up more options:
- Light: This is where you can edit a photos’s shadows, highlights, and exposure, just to name a few.
- Color: Adjust a photo’s saturation and contrast
- B&W: This turns your photo into a black and white photo, but you can further adjust its intensity and tone
- Once you’re done with your edits, tap the Done button at the bottom right corner of the screen and you’re done.
Note that the edits made to the photos are non-destructive. This means that while they will alter the original image, you can always go back to the photo, repeat the process above, and you should be able to restore it back to the original look, although this might be tricky depending on how many edits you’ve made to it and if you can remember the originals.
How To Edit Photos On An iPhone , original content from Ubergizmo. Read our Copyrights and terms of use.from Ubergizmo https://ift.tt/2ZUrUR9

No comments:
Post a Comment